Create and manage Read Replicas
Learn how to create and manage read replicas in Neon
Read replicas are supported with all Neon plans. This guide steps you through the process of creating and managing read replicas.
The general purpose of read replicas is to segregate read-only work from your production database operations. This can be applied to different uses cases, such as:
- Horizontal scaling: Distributing read requests across replicas to improve performance and increase throughput
- Analytics queries: Offloading resource-intensive analytics and reporting workloads to reduce load on the primary compute
- Read-only access: Granting read-only access to users or applications that don't require write permissions
Regardless of the application, the steps for creating, configuring, and connecting to a read replica are the same. You can create one or more read replicas for any branch in your Neon project and configure the vCPU and memory allocated to each. Neon's Autoscaling and Autosuspend features are also supported, providing you with control over read replica compute usage.
Prerequisites
- A Neon account
- A Neon project
Create a read replica
Creating a read replica involves adding a read replica compute to a branch. You can add a read replica compute to any branch in your Neon project using the Neon Console, Neon CLI, or Neon API.
To create a read replica from the Neon Console:
- In the Neon Console, select Branches.
- Select the branch where your database resides.
- Click Add Read Replica.
- On the Add new compute dialog, select Read replica as the Compute type.
- Specify the Compute size settings. You can configure a Fixed Size compute with a specific amount of vCPU and RAM (the default) or enable autoscaling by configuring a minimum and maximum compute size. You can also configure the Suspend compute after inactivity setting, which is the amount of idle time after which your compute is automatically suspended. The default setting is 5 minutes.
note
The compute size configuration determines the processing power of your database.
- When you finish making your selections, click Create.
In a few seconds, your read replica is provisioned and appears on the Computes tab on the Branches page. The following section describes how to connect to your read replica.
Connect to a read replica
Connecting to a read replica is the same as connecting to any branch, except you connect via a read replica compute instead of your primary read-write compute. The following steps describe how to connect to your read replica with connection details obtained from the Neon Console.
-
On the Neon Dashboard, under Connection Details, select the branch, the database, and the role you want to connect with.
-
Under Compute, select a Replica.
-
Select a connection string or a code example from the drop-down menu and copy it. This is the information you need to connect to the read replica from your client or application.
A psql connection string appears similar to the following:
postgresql://[user]:[password]@[neon_hostname]/[dbname]?sslmode=requireIf you expect a high number of connections, select Pooled connection to add the
-poolerflag to the connection string or example.note
Write operations are not permitted on a read replica connection.
View read replicas
You can view read replicas using the Neon Console or Neon API.
To view read replicas for a branch, select Branches in the Neon Console, and select a branch. Read replicas are listed on the Computes tab.

Edit a read replica
You can edit a read replica using the Neon Console or Neon API to change the Compute size or Autosuspend configuration.
To edit a read replica compute using the Neon Console:
- In the Neon Console, select Branches.
- Select a branch.
- Under Computes, identify the read replica compute you want to modify, and click Edit.
- Make the changes to your compute settings, and click Save.
Delete a read replica
You can delete a read replica using the Neon Console or Neon API. Deleting a read replica is a permanent action, but you can quickly create a new read replica if you need one.
To delete a read replica using the Neon Console:
- In the Neon Console, select Branches.
- Select a branch.
- On the Computes tab, find the read replica you want to delete.
- Click Edit → Delete.
Monitoring read replicas
You can monitor replication delay between the primary compute and your read replica computes from the Monitoring page in the Neon Console. Two graphs are provided:
Replication delay bytes
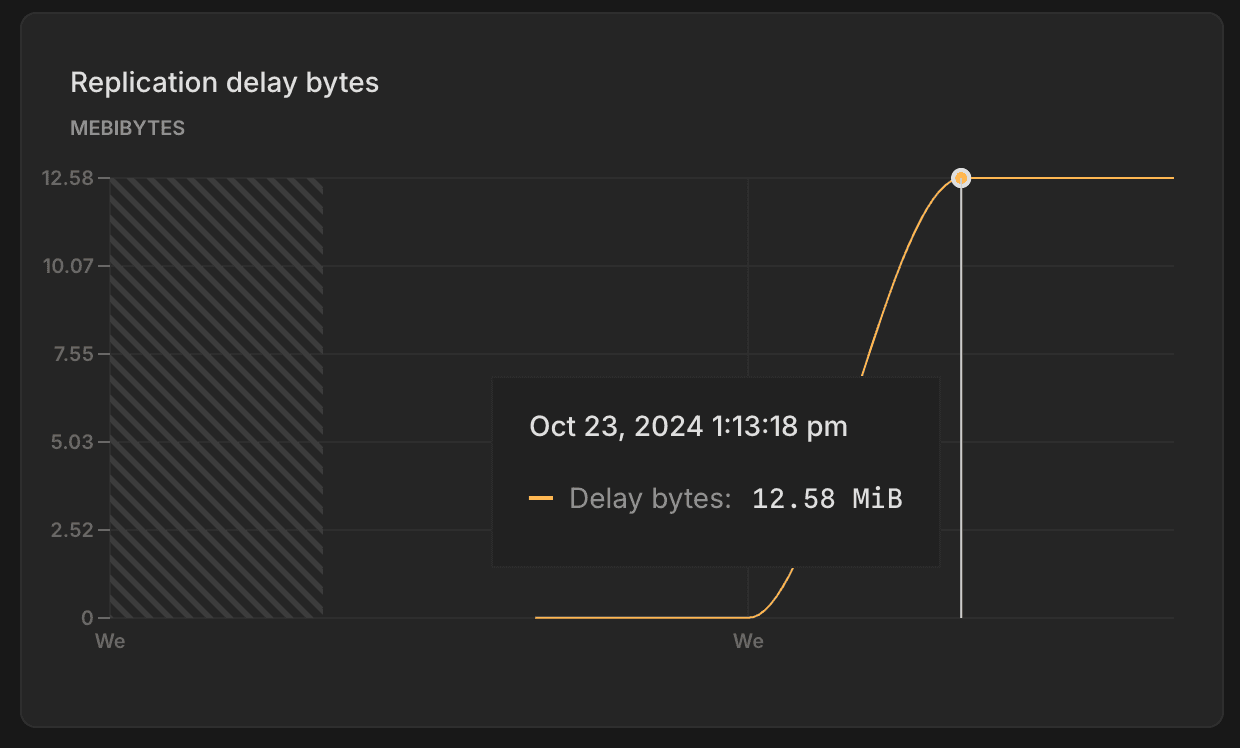
The Replication delay bytes graph shows the total size, in bytes, of the data that has been sent from the primary compute but has not yet been applied on the replica. A larger value indicates a higher backlog of data waiting to be replicated, which may suggest issues with replication throughput or resource availability on the replica. This graph is only visible when selecting a Replica compute from the Compute drop-down menu.
Replication delay seconds
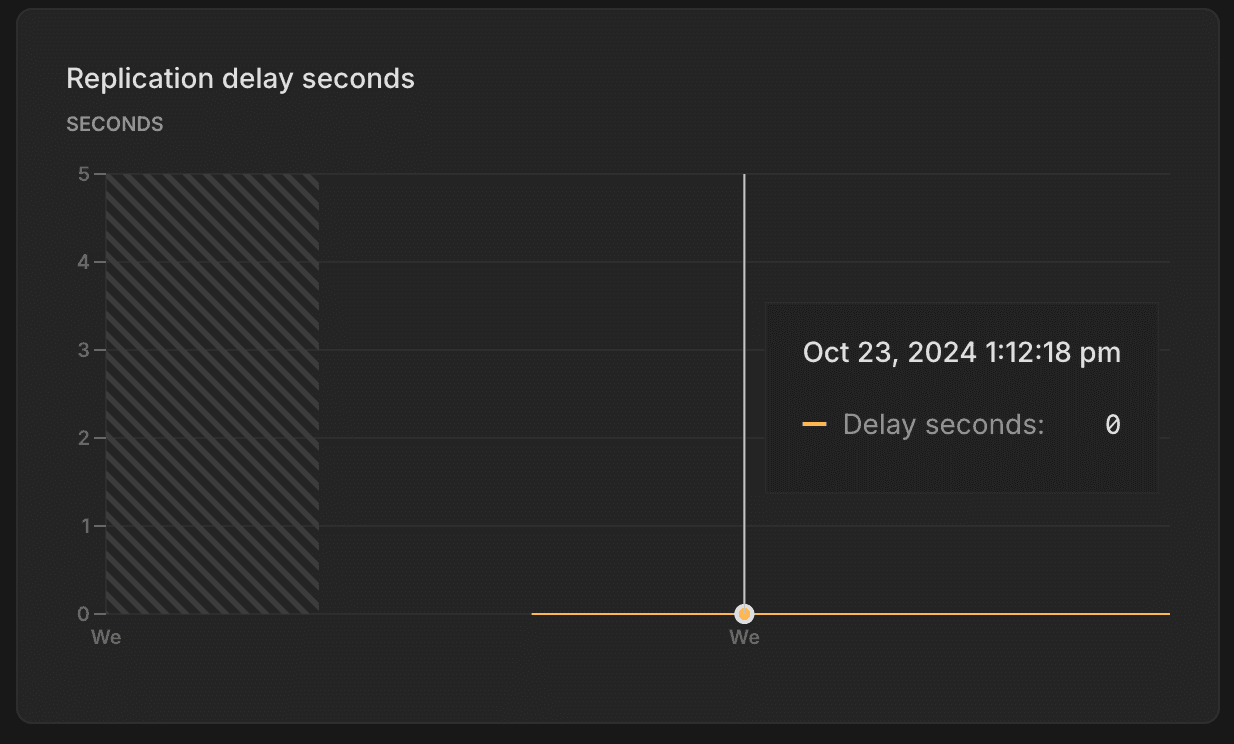
The Replication delay seconds graph shows the time delay, in seconds, between the last transaction committed on the primary compute and the application of that transaction on the replica. A higher value suggests that the replica is behind the primary, potentially due to network latency, high replication load, or resource constraints on the replica. This graph is only visible when selecting a Replica compute from the Compute drop-down menu.
Read replica compute setting synchronization
For Neon read replicas, certain Postgres settings should not have lower values than your primary read-write compute. For this reason, the following settings on read replica computes are synchronized with the settings on the primary read-write compute when the read replica compute is started:
max_connectionsmax_prepared_transactionsmax_locks_per_transactionmax_wal_sendersmax_worker_processes
No users action is required. The settings are synchronized automatically.
Need help?
Join our Discord Server to ask questions or see what others are doing with Neon. Users on paid plans can open a support ticket from the console. For more details, see Getting Support.